


How to segment your Google My Business traffic into Google Analytics
After logging in to Google Analytics to review your conversion goals and the results of your marketing campaigns you wonder how many conversions came from from your Google My Business page.
Sure you can see how many people VISITED your website from Google Analytics (using the Insights page).
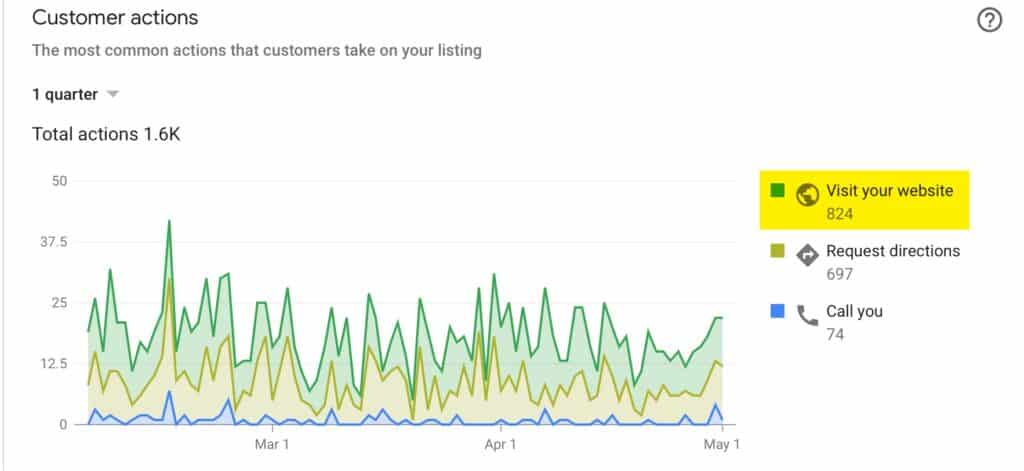
However, the big question is… How many of those visitors to your website bought something, or did the action you’ve spent weeks laboriously crafting the user onboarding journey for?
The answer is, you don’t….but you can!
Understanding Google Analytics Source Medium
When you log in to your Google Analytics page you can easily find where your traffic is coming from. Click on :
- Acquisition
- All Traffic
- Source Medium
- Then you can see the list of traffic sources
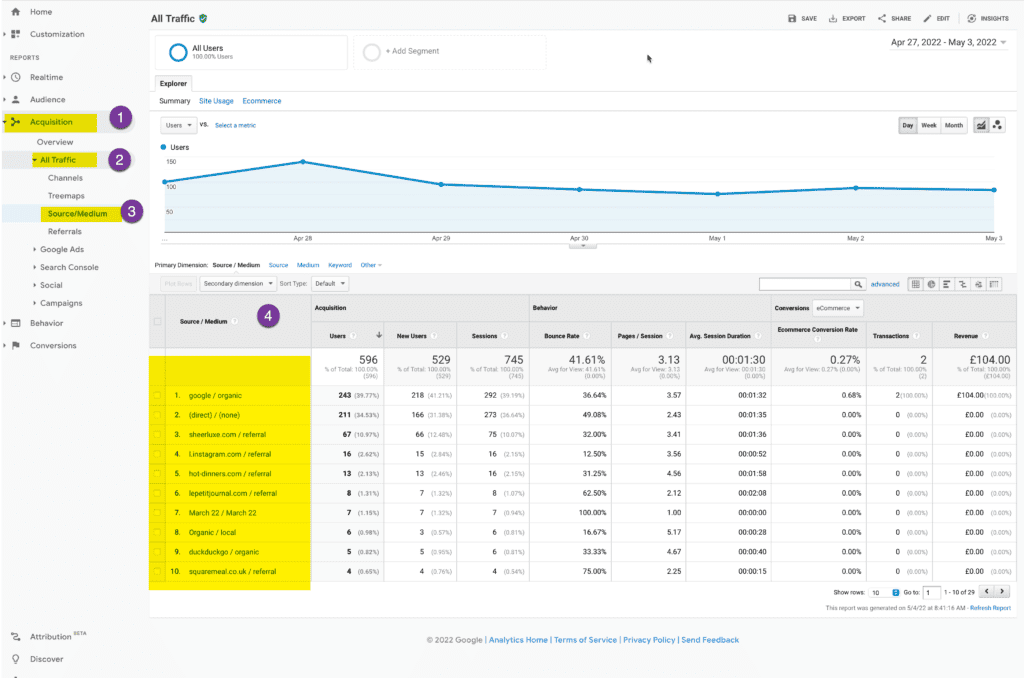
So we can not see in here the traffic from Google My Business. To solve this we are going to do next is to update your Google My Business website link with some special code that Google Analytics will use for segmentation. The way we do this is using the urchin tracking module (UTM):
UTM (Urchin Tracking Module) codes are extra bits of text added to the end of a URL to help Google ANALYTICS track where website users arrive from. when they click a link with these special bits of text, essential information such as: Organic traffic / paid, social network links, marketing campaigns, etc is passed to google analytics allowing data to be categorised / segmented
Google Analytics does a good job of inferring the type of traffic already, but UTM gives YOU control over the segmentation. Let’s get started with creating your link.
We need to head over to a tool provided by Google Analytics Demos & Tools for the campaign url builder – Follow this link https://ga-dev-tools.web.app/campaign-url-builder/
If you’re like most people where you’re an expert at buying stuff online, but less familiar with generating this special url for your business fear not. You’re in safe hands and it really is easy.
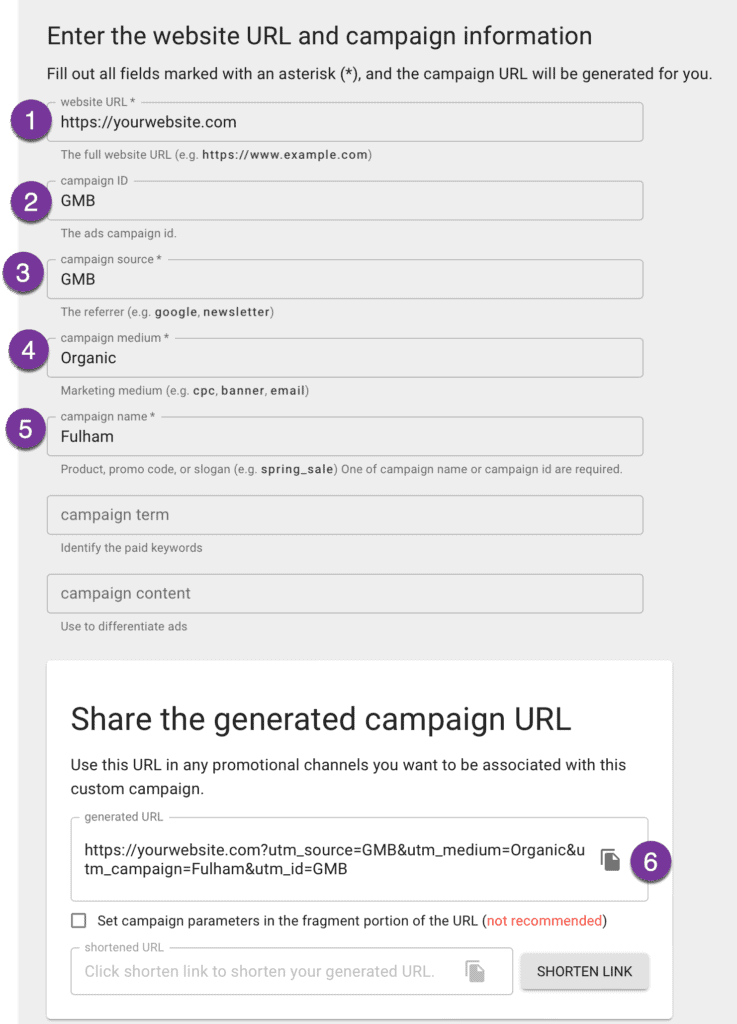
Let’s break it down into the following steps. In this page: https://ga-dev-tools.web.app/campaign-url-builder/ follow these instructions
- Enter your business website link, eg https://yourwebsite.com
- For the campaign ID, enter GMB – this stands for Google My Business
- For the campaign source, enter GMB – this is because traffic to your Google My Business page is typically Organic traffic
- For the campaign medium, enter Organic – this is because people searching for your Google My Business are typically local to your area
- For the campaign name, enter your business location. If you have one location, it’s easy – put the town/city. If you have more than one location/facility you can segment the traffic by each location. Put the street name, name of the facility, whatever makes sense for your different locations
- With the powers of the internet and other sorcery the URL you need is magically created at the bottom of the box. Click on the icon to copy it to your clip board
Top tip: Always test your new link to make sure it opens your website. It’s easy to make a mistake manually typing your website url, especially if it’s at the end of the week and you’re drinking wine. While the window is open, you can check that Google Analytics can “see” the tag information using the Real Time traffic view
Go to:
- Click on Realtime
- Click on Traffic sources
- Look in the main section – you should see Medium is Organic, Source is GMB
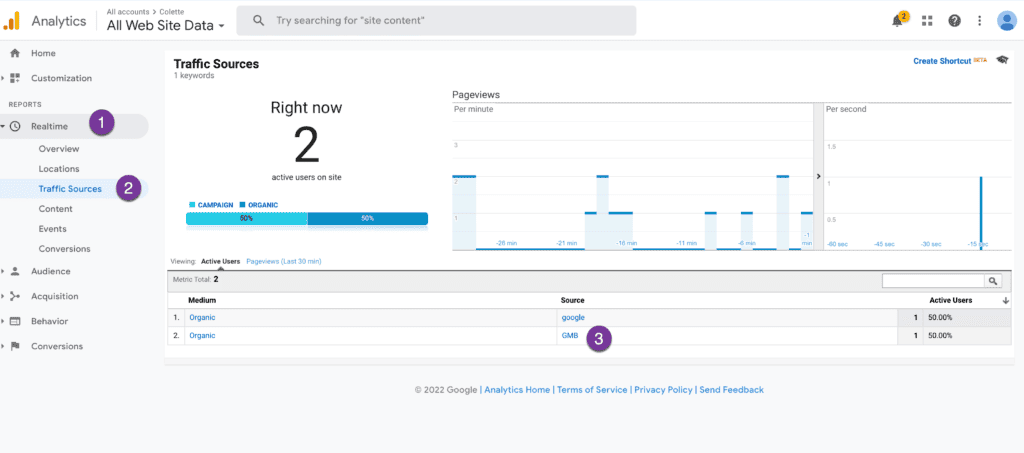
You can see that at the time I took the screenshot the website had 2 visitors. Me and a random person.
Both visits are tagged as organic, however, the random person found the website via a Google Search, and my visit was segmented by source GMB as marked by the number “3” I placed on the picture.
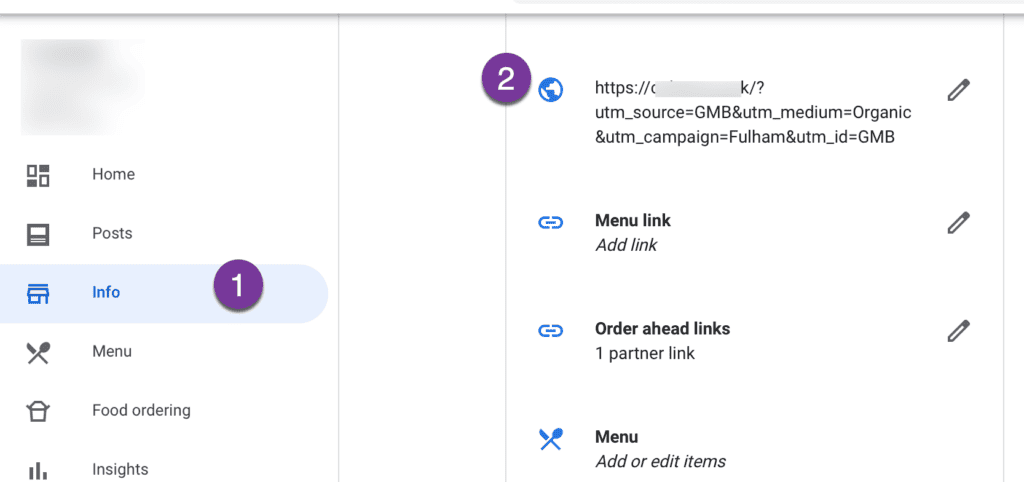
Now head over to your Google My Business listing and update it:
On the Google My Business Profile Manager page
- Select Info on the left hand side
- Scroll down the page and find the icon of the globe and click on the Pencil icon
- Replace your website link with your new fancy link
- Click Apply
And you’re done.
Ready to move on to the next level? Set up a conversion goal in Google Analytics. As this is out of the scope of creating and maximising reviews I’m going to pass you over the All seeing and all knowing Neil Patel for his advice on Google Goal setting
